Building a Custom Ceramic Tile Shower
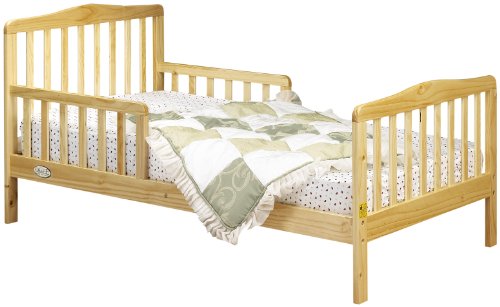
Bed Side Rail
The most important feature in a ceramic tile shower stall is the shower pan. The shower pan channels water to the drain and prevents the shower from leaking. Consequently it is critical that the shower pan be installed correctly and that it is waterproof and durable.
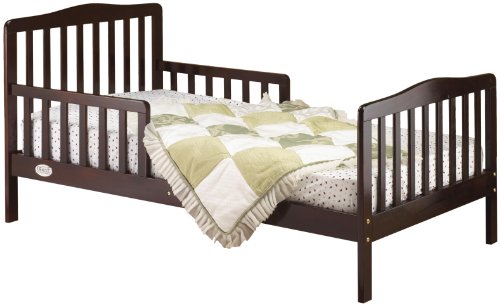
Bed Side Rail
The shower pan is actually a mortar bed consisting of a flexible shower pan liner sandwiched between two layers of mortar. The shower stall walls are framed with 2x4 studding and faced with some type of backerboard underlayment designed for receiving ceramic tile.
The installation of a shower pan starts with the spreading of a layer of mortar. The mortar needs to be sloped properly to enable water to run off towards the drain. The flexible plastic shower pan membrane liner is then installed on top of the sloped mortar bed.
The shower pan membrane liner should be cut to size and hand molded into the shower base.
Note: The shower pan should be cut to size such that several extra inches of shower pan material can be run up the shower stall side walls to enable the shower pan to be secured with nails to the studs. Also, the shower pan should be installed prior to the installation of backerboard on the shower walls.
After the shower pan membrane is secured, the second layer of mortar should be installed in the base of the shower, again maintaining the slope of the mortar towards the drain.
Once the shower pan mortar bed has set up, you can install the backerboard to the walls and begin to install the ceramic tiles.
Start the installation of tiles in the center of the shower pan area and work your way outwards.
Next, install ceramic tiles on the walls. Use a plumb line to run straight lines down the length of the walls. Position the plumb line at the ceiling and centered on a wall. Snap the line, so that you have a vertical line running the length of the wall.
Next, Install your tiles outwards from the line toward the edges of the wall. Repeat this process for all the walls.
For tile cutting, a wet saw works best, as you can obtain very accurate cuts and minimize ceramic tile waste.
After the ceramic tile has had 24-48 hours to set up, grout can then be applied to the tile.
Finally a sealer should be used on the grout to minimize moisture seeping through the grout lines.
For more information on installing a shower pan membrane liner, see the Shower Pan Membrane Liner Installation EBook from http://www.HomeAdditionPlus.com The Shower Pan Membrane Liner EBook will quickly teach you the step-by-step process for installing the shower pan membrane liner correctly. It includes instructions on framing the shower stall, pouring the pre-slope and shower base mortar, and installing the shower pan membrane liner.
Tiling a Shower Stall Starts with a Shower Pan
Bed Side Rail
Jan 03, 2012 12:10:21
Click for larger image and other views
 >> Click here to update Christmas prices for BedClaw Queen/King Footboard Attachment Kit, with Combo Bag <<
Christmas Sales BedClaw Queen/King Footboard Attachment Kit, with Combo Bag Feature
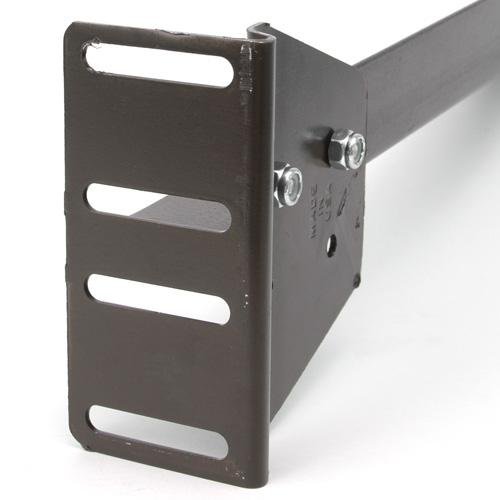
- These footboard brackets attach to your existing headboard-only style bed frame allowing you to attach a bolt-on footboard.
- (2) 13" (Queen/King) Extension Rails, (2) Two Footboard Brackets,(8) Eight Hex Bolts and (8) Eight Locking Tensi-Nuts to attach the extension rails to your Bed Frame
- (4) Four 3 1/2" Bolts, (4) Four Nuts, and (8) Eight Washers for attaching the bracket to your headboard and instructions
- Download installation instructions using this link (PDF File) - http://www.quebot.com/AZN21340
- Although These Rails Are 13" Long, There Is Some Necessary Overlap Between The Extension Rails To Be Bolted To The Bedframe. Because of this Overlap, Your Extension Rails Will Actually Extend The Length of Your Bedframe 11-5/16"
Christmas Sales BedClaw Queen/King Footboard Attachment Kit, with Combo Bag Overview
What These Brackets Do:
These footboard brackets attach to your existing headboard-only style bed frame allowing you to attach a bolt-on footboard. Our footboard brackets only work on bed frames that have holes in the side-rails for bolting on the footboard brackets; otherwise, some drilling may be required.
Please Select the Correct Size:
Each BedClaw™ footboard kit contains hardware for the size bed you have, please insure you purchase the correct size. The twin and full size kits have a 7" rail extension, while the queen or king size kits have a 13" rail extension. Otherwise, all other parts are the same; the length of the included extension rail determines what bed size it would fit. Click on thumbnails for larger view.
Dimensions Note:
Please note, these Extension Rails are 13" in length. However, when the Extension Rails are bolted to your bedframe, there is some necessary overlap between the bedframe and the extension rails to allow the extension rails to be bolted to the bedframe. Because of this necessary overlap, the extension rails will actually extend the length of your bedframe 11-5/16". Please see the Dimensions illustration under More Views above for an illustrated representation of this necessary overlap.
What's Included:
(2) Two 13" (Queen/King) Extension Rails
(2) Two Footboard Brackets
(8) Eight Hex Bolts and (8) Eight Locking Tensi-Nuts to attach the extension rails to your Bed Frame
(4) Four 3 1/2" Bolts, (4) Four Nuts, and (8) Eight Washers for attaching the bracket to your headboard
Instructions
Although These Rails Are 13" Long, There Is Some Necessary Overlap Between The Extension Rails To Be Bolted To The Bedframe. Because of this Overlap, Your Extension Rails Will Actually Extend The Length of Your Bedframe 11-5/16"
SAVE NOW on Christmas Sales Offers below!
Available In Stock. |
| This Christmas BedClaw Queen/King Footboard Attachment Kit, with Combo Bag is cheap and shipping as well. |
|

Limited Offer Today!! BedClaw Queen/King Footboard Attachment Kit, with Combo Bag Christmas and Cyber Monday 2011 Deals
Sofa Table Tray Wooden Futon Beds Panasonic Lumix Camera Cases